Dynamic Speaker/Audio Lines (VISUAL FEEDBACK)
By: Anelise (AJ) Mize
I was surprised to find that this Blueprint related topic has not been explored or explained. It could be that I was not searching for the correct terminology of this particular concept, or that it was just buried under mounds and mounds of other audio-related problems and tutorials that had little or nothing to do with art, and more with debugging or editing, and I was unable to find it. Nevertheless, in the event that this has, in fact, not been explored, I felt it necessary (as someone who also needed this for her thesis project) to do my own tutorial on it, as it seems more and more stylized games have been using it lately.
___________________________________________
1. Blueprint and Variable Creation
-
Right click in the content window and select “Blueprint Class"...then select Actor for the type of class, and rename it. Call this what you will--for my tutorial I am simply going to name it Speaker Lines:


-
Next, we need to create a few float variables in the Blueprint (BP for short), starting with one that will determine the minimum audio threshold needed to trigger our event. I’m going to call this variable Threshold, and I’m going to be giving it a 0.3 value in the default value box:
You may make this lower/higher if you want, just be aware that the lower the value, the more likely your event will be triggered by the smallest of noises, and the higher you go, the less likely the audio will be triggered unless it’s by something loud or if the audio itself reaches that volume.
-
Now we will need to create another float variable for our actual audio that will be playing. Let’s just call this Audio Volume. This variable is going to be used to register the volume of our audio at any time, no matter when it’s playing. There is no need to give this a value as we are going to set the variable up so any time its volume changes, its value will also change.

-
We just need to add one more item to our BP before we can start to put some of it together, and that's our audio! Drag your cursor up to the Components/Scene window in the upper left-hand corner of your BP window and press the + Add Components button. A drop down menu should appear. Search for "audio" and select it.

Congratulations! We now have Audio for our speaker lines! Feel free to add your own audio to it in the details panel.
2. Set-Up
___________________________________________
-
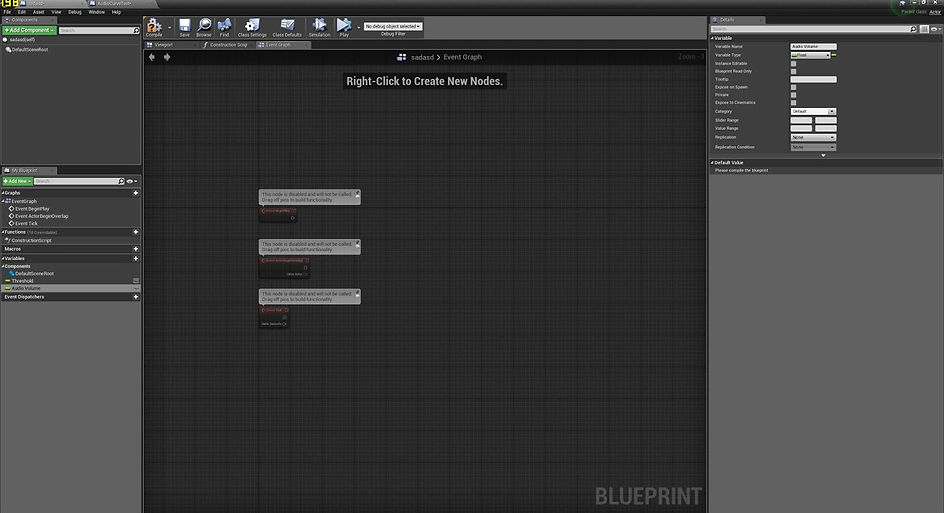
Now we can begin setting up our code. You should be seeing a screen similar to the one below. We only need Event Begin Play, so you can delete or move the other two nodes, it's up to you.
-
Drag out the execution pin from Event Begin Play and type in "Bind Event to OnAudioSingleEnvelopeValue." Make sure Context Sensitive is checked off, otherwise it won't show up!

-
We're going to want to create our own Custom Event that is bound to the OnAudioSingleEnvelopeValue node. This allows us to have a Custom Event running from Begin Play as well as our audio. You will then take your audio and plug it in to the Target node of the OnAudioSingleEnvelope and Play node (seen below):

-
Now that we have our begin play section set up, it's time to put together the first bit of code needed to make our speaker lines register with our audio:
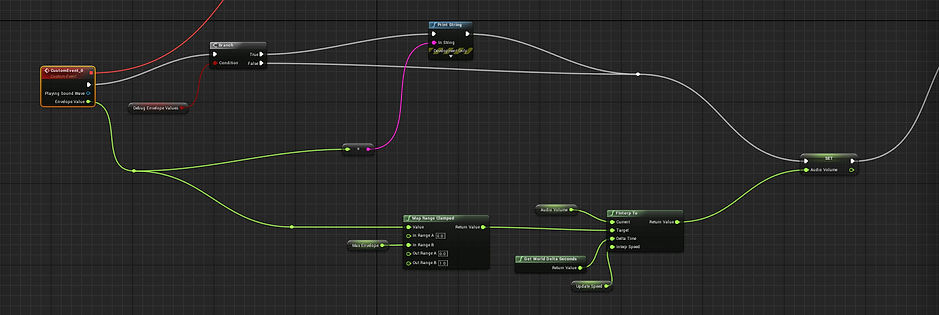
NOTE: The Branch and Print String nodes are for debugging purposes only...used when our boolean condition is true, in which it will print raw envelope values from the audio source, that can then be used to determine a good MaxEnvelopeValue. In other words, it prints our audio's volume (or "envelope") values onto the screen, allowing us to pick an appropriate range of numbers we want to clamp our min and max volume at.
-
The first bit of code in this sequence involves setting our Audio Volume's "Max Envelope." You will need to create another float variable for this. Set the default value of it to 0.1. The reason for this is because this maximum envelope value is measured from any of our used audio. Our Audio Volume will then change to a 0-1 value using this maximum value.
-
Once we have our Max Envelope variable, we must use a Map Range Clamped node so that the volume requirement to trigger our event does not have an unlimited range. We also use this node because envelope values are generally low, and a Map Range Clamped node remaps the low values to 0-1, which is easier to use for animation and VFX purposes. Take your Max Envelope variable and plug it in to the Map Range Clamped node at In Range B (see below). The Out Range B value should be set to 1.0.
-
From there we simply take the Return Value of our Map Range Clamped node and plug it in to a FInterp To node. This node allows us to go from one float variable to the other by a time we set (in this case I want it in world delta seconds) and how fast I want this speed to update. All of this will help determine our final audio volume variable, which we plug the Return Value of our FInterp To node into (see below).

-
Now that we have our envelope values clamped and our audio volume set based on it, we can finally set up the code that will help make our speaker lines (just a simple cube mesh) move!:

-
From our Set node of Audio Volume, insert a Sequence node. Drag off the first execution pin to a Set node for your Last Audio Volume variable. Plug an Audio Volume variable into the green pin (see above). This is so our Last Audio Volume is always being updated by the ever changing Audio Volume variable, which subsequently makes sure our event doesn't stop while audio is playing.
-
And finally, the last step for our code: changing the size of our lines/meshes. To do this, we need a Set Relative Scale 3D node. Plug this into a second execution pin from the Sequence node. Your targets will end up being what you have picked as your "speaker lines" (the cube mesh(es)) and the New Scale 3D should be attached to a Lerp (vector) node. A and B are simply the sizes you'd like to start from (A) and move to (B), with your Alpha being your Audio Volume variable, which ensures that every time the audio changes based on volume, your speaker lines will subsequently change as well.
-
Go ahead and test your code! Your mesh should now be reacting to the audio and changing size based on audio volume. If it isn't working, please check the screenshots and make sure you've plugged in variables and nodes accordingly.
___________________________________________
3. Materials
-
For the material, I just made an Unit, Transparent material and gave it a simple yellow color. I then multiplied this 3-vector parameter with a very small number (I used 2) so it was constantly bright, never affected by lighting, but didn't give off enough light itself to affect anything around it. Apply the color to the meshes you're using for lines and place it in your map to test it out!

4. Final Product
___________________________________________
Your final product should act like something similar to the image below:
If you are having a hard time getting the speaker lines to originate from a single point instead of the center of the mesh, the only way to fix this is by adjusting your pivot point to the bottom of the cube mesh you are using to make the speaker lines.
You now have dynamic speaker lines that react to audio components! Use them for a variety of different audio files!
I hope this tutorial helps! I will update this later to include how to keep the lines hidden until audio spawns.